영상처리할 때 필수품 !
OpenCV
많은 기능들을 OpenCV로 손쉽게 사용할 수 있어요
설치 환경은 윈도우 10, Visual Studio 2017, OpenCV 4.3.0입니다.
Releases
opencv.org


저는 C에다가 바로 깔았어요
이제 환경변수 등록입니다.
(환경변수 등록을 하는 이유는 나중에 dll 에러가 나는 경우를 방지)


C:\opencv\build\x64\vc15\bin을 시스템 변수 Path에 추가해줍니다.
여기서 Visual studio가 2017보다 구버전이면 vc14로 변경하여 추가해줍니다.
이제 환경변수 등록도 끝났으니 Visual Studio로 가봅시다~

프로젝트를 하나 생성해주시고

디버그 옵션은 64비트로 변경!
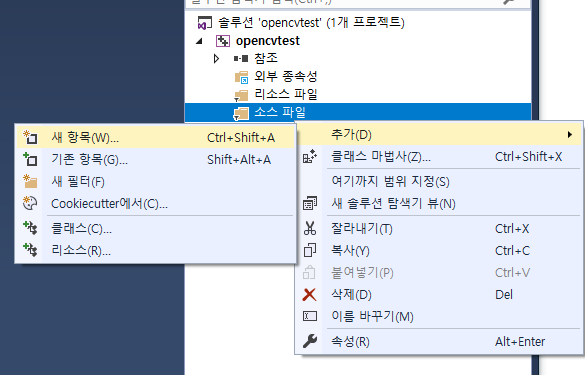
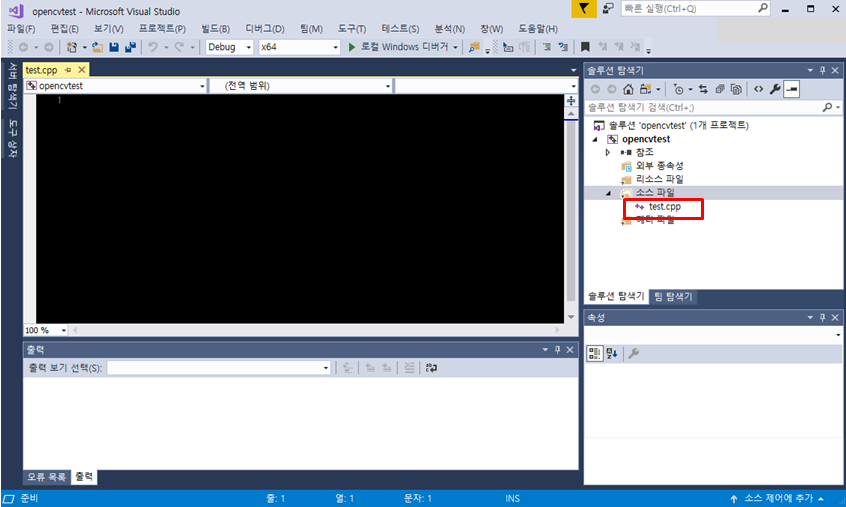
소스파일에 test.cpp를 추가해줍니다.
현재 상황!
이제 프로젝트 속성을 변경해줍니다.


구성 모든 구성으로 하시고 C/C++ 일반에 추가 포함 디렉터리에 C:\opencv\build\include를 입력해주세요
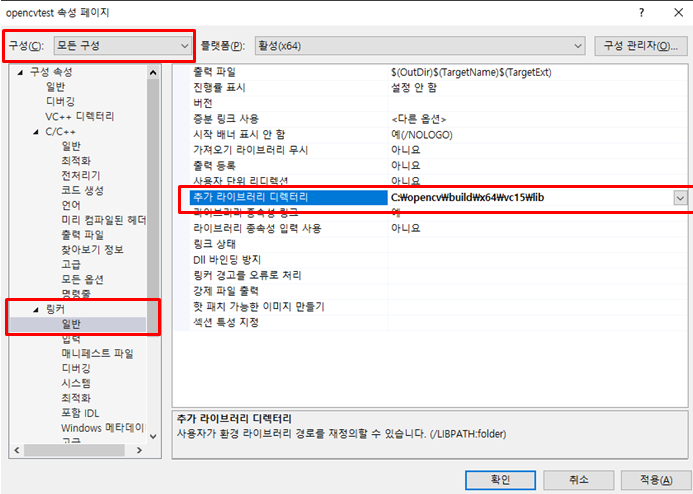
마찬가지로 모든 구성에서 링커 일반에 추가 라이브러리 디렉터리에 C:\opencv\build\x64\vc15\lib를 입력해주세요


구성을 Debug로 바꾸고 opencv_world430d.lib를 입력해주세요.


구성을 Release로 바꾸고 opencv_world430.lib를 입력해주세요.
그러면 OpenCV가 잘 설치되었는지 Test코드를 실행해보겠습니다.
웹캠 영상을 출력하는 코드에요!
/**
@file videocapture_basic.cpp
@brief A very basic sample for using VideoCapture and VideoWriter
@author PkLab.net
@date Aug 24, 2016
*/

#include <opencv2\opencv.hpp>
#include <iostream>
#include <stdio.h>

using namespace cv;
using namespace std;

int main(int, char**)
{
	Mat frame;
	//--- INITIALIZE VIDEOCAPTURE
	VideoCapture cap;
	// open the default camera using default API
	cap.open(0);
	// OR advance usage: select any API backend
	int deviceID = 0;             // 0 = open default camera
	int apiID = cv::CAP_ANY;      // 0 = autodetect default API
								  // open selected camera using selected API
	cap.open(deviceID + apiID);
	// check if we succeeded
	if (!cap.isOpened()) {
		cerr << "ERROR! Unable to open camera\n";
		return -1;
	}

	//--- GRAB AND WRITE LOOP
	cout << "Start grabbing" << endl
		<< "Press any key to terminate" << endl;
	for (;;)
	{
		// wait for a new frame from camera and store it into 'frame'
		cap.read(frame);
		// check if we succeeded
		if (frame.empty()) {
			cerr << "ERROR! blank frame grabbed\n";
			break;
		}
		// show live and wait for a key with timeout long enough to show images
		imshow("Live", frame);
		if (waitKey(5) >= 0)
			break;
	}
	// the camera will be deinitialized automatically in VideoCapture destructor
	return 0;
}
그리고 F5를 눌러 실행시켜줍니다.
바로 잘 되면 성공!
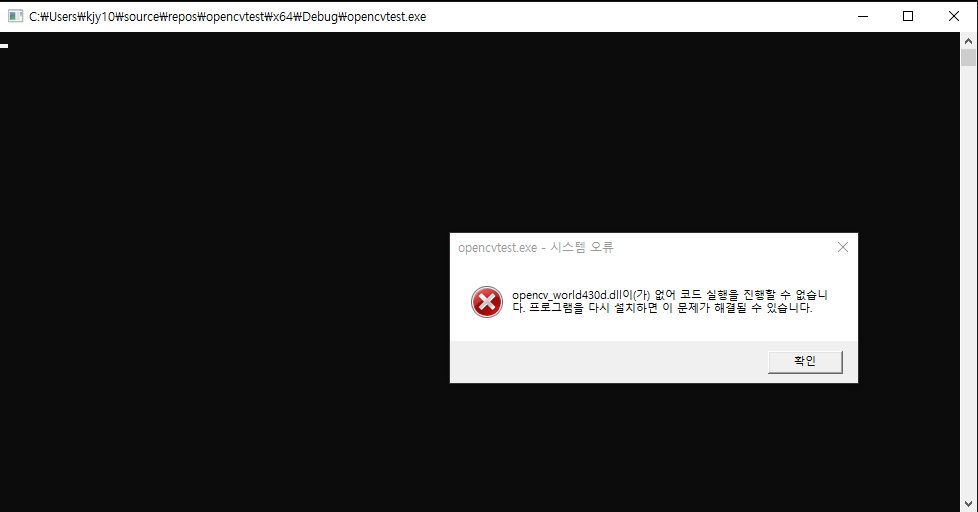
하지만 opencv_world.dll 오류 경고가 뜬다면 다음과 같이 해결해주시면 됩니다.


프로젝트 폴더에
C:\opencv\build\x64\vc15\bin에 있는 opencv_world430.dll, opencv_world430d.dll 파일을 넣어줍니다.
그리고 다시 F5로 실행하면 웹캠 영상이 잘 출력됩니다!

고생하셨습니다.
'전자공학 > 프로그래밍' 카테고리의 다른 글
| 코딩 스타일 가이드는 왜 있는가 (0) | 2021.08.22 |
|---|---|
| 파이썬 아나콘다 설치하기, tensorflow 설치하기 (0) | 2020.04.14 |
| 윈도우10 파이썬 python 설치 (친절 설명) (0) | 2020.04.14 |
| extern, static, const, volatile 간단 정리 (0) | 2020.03.31 |
| 비트필드 (Bit field)! (0) | 2020.02.11 |